Creating a Filtered Track Group
We utilise Filtered Track Groups to allow easy sorting of music for automated playout.
You Will Need
- An account for PlayIt Live which has elevated permissions, which you have logged into
Steps
- Navigate to
Track Groupsfrom within theManagemenu in the Menu bar at the top of the main window - Click the
Add Newbutton in the bottom left hand corner of the Manage Track Groups window which pops up - Select
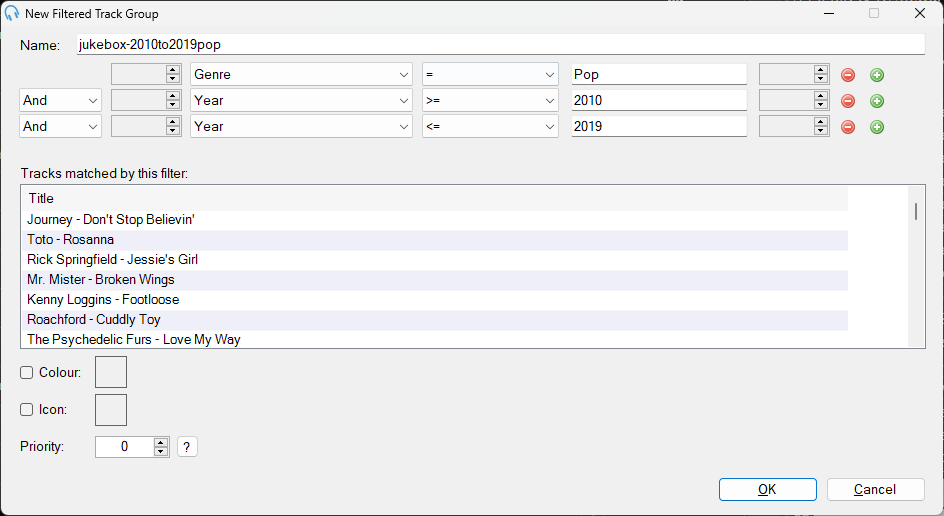
Filtered Track Groupand pressOK - Enter a suitable name for the track group - for example
jukebox-2010to2019pop - Use the Filter options to select the filtering criteria for the tracks. An example is shown below for setting the filters to filter for Pop from between 2010 and 2019.

- Press OK
- The
Manage Track Groupswindow will now come back up. Confirm that there are at least some tracks in your new group. - If this is a track group which is soley to be used as a Jukebox filter, then check the checkbox in the hidden column. This will prevent the track group from being available to DJs as having lots of them visible will confuse them
- Press OK which will close the
Manage Track Groupswindow
Congratulations - you’ve successfully created a new Filtered Track Group.